

Signature transactions
SPI provides a workflow for handling transactions that require a signature.
See the code
Take a tour of the code below, and copy it into your project to get started.
Handle signature transactions
Depending on the customer's bank or card, some transactions may require them to sign a receipt. SPI handles this using a workflow that your integration must support. In this workflow, a ‘receipt to sign’ is printed, the customer signs the receipt, and the merchant accepts or rejects the signature.
To handle signature transactions, you must use logic similar to the following.
- If the 'TxFlowStateChanged' event contains
AwaitingSignatureCheck: true...- Print the 'receipt to sign':
e.detail.SignatureRequiredMessage._receiptToSign - Display a user interface for the merchant to choose whether to accept or reject the signature ...
- Accept — call
spi.AcceptSignature(true) - Reject — call
spi.AcceptSignature(false)
- Accept — call
- Print the 'receipt to sign':
For an example, see the events code sample.
After the merchant accepts/rejects the signature, the transaction will proceed. When finished, the 'TxFlowStateChanged' event will occur again and it can be handled as a normal transaction.
Note:
- Learn what causes some transactions to require a signature.
- Learn how to create a UI for signature transactions.
Testing
When using Gecko Bank, you can test the signature workflow as follows.
- Start a transaction, e.g. by calling
spi.InitiatePurchaseTxV2(...) - In Gecko Bank, click Swipe > Credit > click Enter without entering a PIN to trigger the signature workflow. The 'TxFlowStateChanged' event will occur containing
AwaitingSignatureCheck: true
Note that since Gecko Bank is a virtual terminal, no receipts will be printed.
Confirm signature on terminal
Some EFTPOS terminals allow the merchant to confirm the signature on the terminal. If this occurs, the 'TxFlowStateChanged' event will contain AwaitingSignatureCheck: false meaning that the POS does not need to handle the signature, and it can handle the transaction normally.
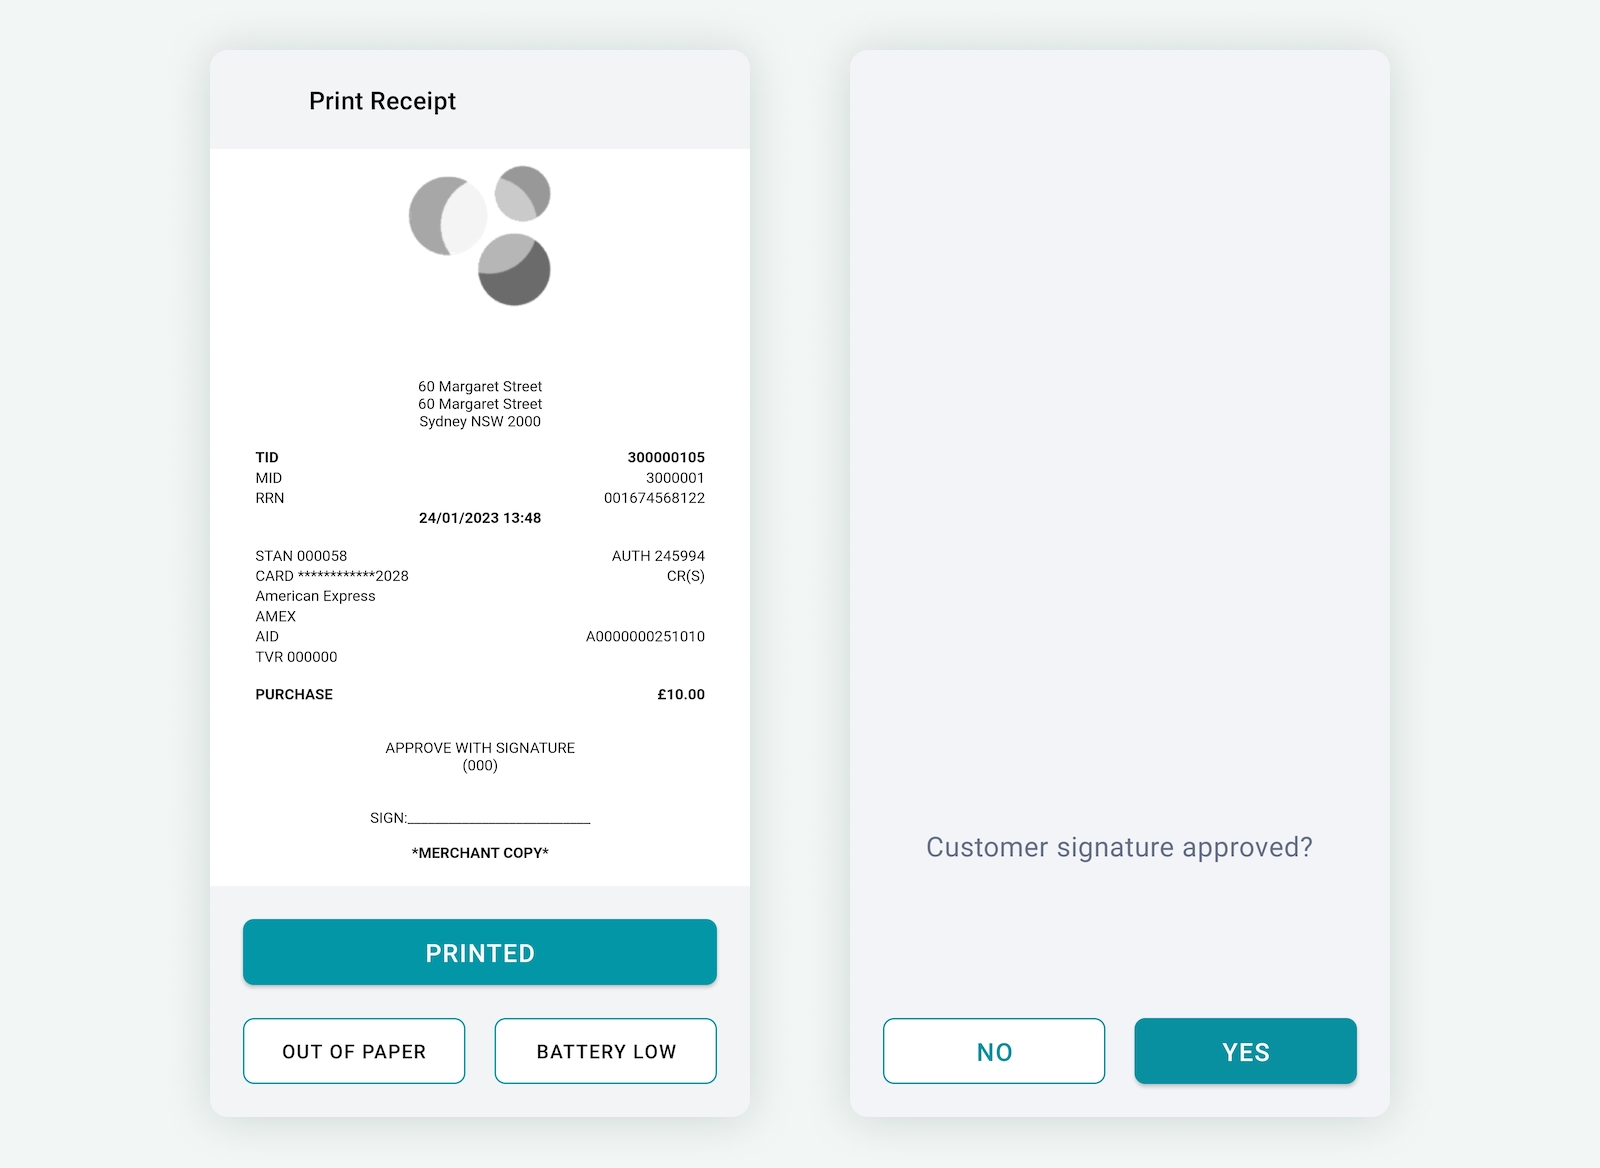
When using Gecko Bank, you can confirm the signature as follows.
- The ‘receipt to sign’ will display on the Print receipt screen. Since Gecko Bank is a virtual terminal, it does not print receipts, so click Printed to move on.
- Click Yes to approve the customer's signature.
- Click Yes if you want to print a receipt for the customer (however, Gecko Bank doesn't print receipts).
- Click Printed to finish.
Updated 8 months ago